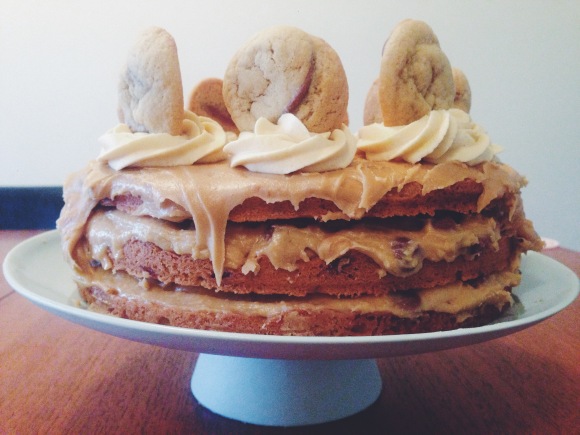
Salted Caramel and Cookie Dough Cake

Processed with VSCOcam with f2 preset


My younger sister Claire shares my love for ridiculously indulgent sweets, therefore each year on her birthday I have the challenge of coming up with something that will out do the year before.

This year I asked her what type of cake she wanted.  Claire’s response was ‘cookie, salted caramel, marshmallow, ginger cake’. Unfortunately for Claire, I wasn’t able to use all ingredients requested, however I did some research and this is what I came up with.

If you are a fan of cookie dough, this cake is definitely for you! Happy baking!

Ingredients 
For the cookie layers:
  • 1 cup butter, softened to room temperature
  • 3/4 cup caster sugar
  • 
3/4 cup brown sugar
  • 2 eggs
  • 2 teaspoons white vinegar
  • 1 tablespoon vanilla
  • 3 cups plain flour
  • 3/4 teaspoon salt
  • 1 teaspoon baking soda
  • 1 tablespoon cornstarch
  • 340g milk chocolate chips
Chocolate chip cookie dough filling:
  • 12 tablespoons salted butter, room temperature
  • ⅔ cup light brown sugar
  • ⅔ cup sugar
  • 1 teaspoon vanilla
  • ¼ teaspoon salt
  • 1½ cups plain flour
  • 4 tablespoons milk
  • ½ cup mini chocolate chips
Caramel frosting:
  • 2 tablespoons butter
  • 3 tablespoons heavy cream
  • ½ cup light brown sugar
  • ½ teaspoon vanilla extract
  • ¼ teaspoon salt
  • 1 cup powdered sugar
Brown sugar buttercream:
  • ¼ cup packed light brown sugar
  • 2 tablespoons butter
  • 2 tablespoons heavy cream
  • ½ cup butter, softened to room temperature
  • 1½ cups pure icing sugar
Method 
To make the cookie layers:
  1. Preheat oven to 180 degrees. Beat the butter and both sugars until light and fluffy. Add eggs and beat until mixed. Beat in vinegar and vanilla. Mix together the flour, salt, baking soda, and cornstarch in a large bowl. Slowly add to batter and mix just until blended. Stir in the chocolate chips by hand until mixed.
  2. Make 8 mini cookies for decoration by dropping 8 teaspoons of dough separately onto parchment paper lined baking sheet, leaving about 2 inches in between cookies. Bake 8-9 minutes or until cookies are set and light golden brown around. Cool on baking sheet for 2 minutes before transfer to a wire rack to cool completely.
  3. Line three 9-inch cake pans with a wax or parchment paper circle in the bottom of each, then spray with nonstick cooking spray. Divide the dough up evenly between each pan, patting into place. Bake for 18-22 minutes or until dough is set in middle and is light golden brown around edge. Cool completely on wire rack.
To make the cookie dough filling:
  1. Beat the butter, both sugars, the vanilla, and the salt until light and fluffy. Beat in the the flour and milk. Stir in the chocolate chips. (Can use more or less milk to adjust consistency to make it spreadable.)
  2. At this point, place one cookie cake layer on a cake platter, flat side down. Spread with half the cookie dough. Place another cake layer, flat side down on the cookie dough, then spread with remaining cookie dough. Place the third cookie layer on top, flat side down again.
To make the caramel frosting:
  1. Melt the butter, heavy cream and brown sugar over medium-high heat until boiling, whisking often. Boil vigorously for one minute. Remove from heat, then stir in vanilla and salt. Beat in the powdered sugar with a hand mixer.
  2. Immediately frost the top of the cake only, letting it drip down sides. Work quickly, because this frosting hardens fast.
To make the brown sugar buttercream dollops:
  1. Heat the light brown sugar, 2 tablespoons butter, and 2 tablespoons cream over medium heat in a medium heavy saucepan, whisking often, until butter melts. Continue to cook until mixture begins to boil, then boil for one minute, whisking constantly. Remove from heat and cool completely. (It will need to be completely at room temperature or it will melt the butter in the next step.)
  2. In a large mixing bowl, beat ½ cup softened butter on high speed until smooth and fluffy. Beat in the cooled brown sugar-bourbon mixture until smooth. Beat in 1½ cups of powdered sugar, ½ cup at a time, until smooth and fluffy.
  3. Place the frosting in a piping bag with a large tip, then pipe 8 dollops around the perimeter of the top of the cake. Place a mini cookie in the center of each dollop. This can be stored at room temperature.

Recipe adapted from Mississippi Kitchen
Tagged , , , , , , ,

Gingerbread Sticky Date Pudding with Caramel Sauce & Toffee chips

FullSizeRender

Getting into the Christmas spirit I’ve decided to post a recipe I trialled with my best friend, Katy a couple of months ago.  Who doesn’t enjoy a good sticky date?

Katy and I share the love of ginger and both wanted to step away from the traditional sticky date pudding. So, Katy and I decided to combine the flavours together and in the words of Katy the end result was, ‘ERMAGAHD!’ The combination of the moist pudding with the crunch of the toffee chips was heavenly!

This is the perfect dessert for Christmas if you aren’t into the traditional Christmas pudding.

Serves 8-10

Ingredients

Gingerbread Sticky Date Pudding:

(1) 9 ounce container of packed pitted dates

2 cups water

2 teaspoons baking soda

2 cups all-purpose flour

1/2 teaspoon baking powder

1 teaspoon ground ginger

1 teaspoon ground cinnamon

1/4 teaspoon cloves

1/2 teaspoon salt

5 tablespoons unsalted butter, at room temperature

1 cup dark brown granulated sugar

3 large eggs + 1 egg yolk

2 teaspoons vanilla extract

Toffee Caramel Sauce

1 3/4 sticks (3/4 cup plus 2 tablespoons) unsalted butter

1 1/2 cups packed light brown sugar

1 cup heavy cream

1/2 cup toffee chips (recipe below)

Toffee Chips

1/2 cup butter

1/2 cup sugar

2 tablespoons of water

pinch of salt

Instructions

Gingerbread Sticky Date Pudding:

Preheat oven to 180 degrees. Butter and lightly flour an 8-inch square baking pan; set aside.

Heat 2 cups of water until boiling. Coarsely chop dates and place them in a large, heat proof bowl, and pour boiling water over the dates. Stir in baking soda (mixture will foam), cover, and let mixture stand 20 minutes.

While mixture is standing, mix together flour, baking powder, ginger, cinnamon, cloves and salt.

In a large bowl with an electric mixer beat together butter and sugar until light and fluffy. Beat in eggs and yolk, 1 at a time, beating well after each addition. Add vanilla.

Add flour mixture in 3 batches, beating after each addition until just combined.

Add date mixture and with a rubber spatula stir batter until just combined well.

Pour batter into baking pan and set pan in a larger baking pan.

Add enough hot water to larger pan to reach halfway up sides of smaller pan and bake in middle of oven until a tester comes out clean, 35 to 40 minutes.

Remove smaller pan from water bath and transfer pudding to cool in the pan on a wire rack.

Make Toffee Caramel Sauce while pudding is cooling:

In a 1 1/2- to 2-quart heavy saucepan melt butter over moderate heat and add brown sugar. Bring mixture to a boil, stirring occasionally, and stir in cream and vanilla. Simmer sauce, stirring occasionally, until thickened slightly, about 5 minutes. Cool sauce to warm.

For the toffee chips, place all ingredients in a sauce pot. Bring ingredients to boil of medium-high heat (about 5 minutes). Continue cooking for about 8 more minutes until the mixture starts to turn brown. Pour onto a baking sheet and spread thin. Allow to cool.  Place in a plastic bag and break the bits with a can.

Cut warm pudding into squares. Serve pudding with ice cream, warm sauce and sprinkle over toffee chips.

Recipe adapted from Baker by Nature.


Tagged , , , , , , , ,

Banana Salted Caramel Muffins

FullSizeRender (2)


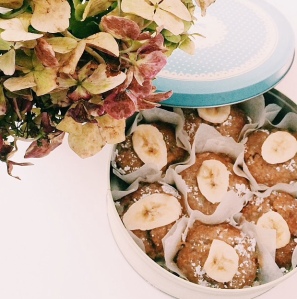
For Mother’s day this year, my family decided to have a picnic in the St Kilda Botanical gardens.  We couldn’t have asked for a better day.  The sun was shining and for the first time, my family were organised for the festivities ahead.  On request, mum asked me to bake salted caramel muffins.

While we were basking in the sun, a young attractive man perched himself on a bench nearby to read a book.  My family decided it would be a wonderful idea for me to approach him and strike up a ‘conversation’.  After 20 minutes of encouragement (peer pressure) I finally got the bravery to go up to him.  He was French. (insert love heart eyes emoji here) We were discussing how Australian’s like salty food in the mornings whereas the French prefer a sweet breakfast.  I happened to drop in the conversation that I had baked banana salted caramel muffins – combining both sweet and salty. What better way to win the heart of a French man than to offer him my baked goods?  He kindly accepted one of my muffins and low and behold he asked for my number!  (Woohoo!)

Unfortunately the love story ends there, however he did tell me how FANTASTIC the muffins were.  What’s more important they were a hit with my family.  So here, I spread the love.  Hopefully you have better luck winning the heart of a French man than I did!

(P.S I added extra salt; add as much as your heart desire!)

Ingredients

1 ¾ cups plain flour

¾ cup white sugar

1 tsp. baking powder

¼ tsp. baking soda

¼ tsp. salt

1 tsp. ground cinnamon

3 large eggs, lightly beaten

½ cup unsalted butter, melted

3 ripe large bananas, mashed well (about 1 ½ cups) + 1 extra

3 tbs. Milk

1 tsp. pure vanilla extract

Salted Caramel Sauce

75g unsalted butter

50g soft light brown sugar

50g caster sugar

50g golden syrup

60mls double cream

Sea salt flakes

Method

Preheat oven to 180C and place the oven rack in the middle of the oven. Line a muffin pan with paper liners or butter or spray with a non-stick spray. In a large bowl combine the flour, sugar, baking powder, baking soda, salt, and cinnamon. In a medium-sized bowl combine the mashed bananas, eggs, melted butter, milk and vanilla. With a rubber spatula or wooden spoon, lightly fold the wet ingredients into the dry ingredients just until combined and the batter is thick and chunky. Do not over mix the batter. Spoon the batter into the prepared muffin tins. Bake about 20 – 25 minutes or until a toothpick inserted in the center comes out clean. Place on a wire rack to cool for five minutes and then remove muffins from pan. While the muffins are cooking make the caramel sauce. Melt butter, sugars, syrup and cream in a small heavy based pan and let simmer for 3 minutes, stirring regularly. Drizzle the caramel over the cooled muffins and sprinkle sea salt flakes over the top. Optional: Slice extra banana into round and garnish the muffins.

Tagged , , , , ,

On.The.Other.Side

On the Other Side is small video project my younger brother did for a communications assignment at University. This blog is inspired by my Mum who has the rare neurological disorder called Multiple Systems Atrophy (MSA). The video was intended to address the social stigma of people with a disability. I thought I’d post this video to help explain what my mum is going though.

Multiple System Atrophy is a rare neurological disorder that affects the nervous systems of the body with an estimated 4.6 cases in 100,000 people. The cell degeneration causes problems such as slow and stiff movement, difficulty in coordinating balance, speech and swallowing difficulties along with other autonomic system dysfunctions.  The cause of MSA is unknown and almost 80% of patients are disabled within five years of onset of the motor symptoms, with only 20% survive past 12 years. For more information please visit www.msaawareness.org and forward this video on to help spread the word.

Video: Jonathan Butler
Voiceover: Samantha Hammersely & Rosemary Butler

Tagged , , , , , , , , ,

Salted.Caramel.Banoffee.Pie

Before I start my 8 week sugar challenge, I thought it was necessary to share this recipe with you. Yes you heard right, in July, my housemate and I are taking on the challenge of no sugar in our diets for 2 months.  So watch this space for our highs and lows and recipes to curb those cravings.

But back to sugar, I made this pie for Mother’s day.  Mum struggles a little with her eating so I wanted something that has a soft crust and gooey centre.  This was the perfect choice.  I have an obsession with everything salted caramel currently, so I decided to experiment a little with the base.  To create the salty flavour I added pretzels and it was a success, well according to the family! Maybe see for yourself. I dare you.

photo (3)

Ingredients

Pretzel Base
240g digestive biscuits, coarsely broken
90g salted pretzels
75g caster sugar
200g butter, melted

Salted toffee
200g caster sugar
80g butter, coarsely chopped
125ml pouring cream

3-4 large ripe bananas
300ml pouring cream
400g creme fraiche
seeds of one vanilla bean
shaved dark chocolate to serve

Method
For pretzel crumb base, process biscuits, pretzels and sugar in a food processor until fine crumbs form, add butter, pulse to just combine, press into base and up sides of a 5cm-deep, 24cm-diameter pie dish and refrigerate until set.

Meanwhile, for salted toffee, stir sugar and 50ml water in a saucepan over medium heat until sugar dissolves, bring to the boil and cook until caramel (6-8 minutes). Add butter, cream and ½ tsp sea salt flakes (be careful as hot caramel will spit), stir until combined, then pour over crumb base and refrigerate until chilled

Arrange banana on top of caramel and set aside. Whisk cream, crème fraîche and vanilla seeds in an electric mixer until firm peaks form. Spoon on top of banana, scatter with chocolate shavings and serve.


Recipe adapted from Gourmet Traveller

Tagged , , , , , , ,

Mitte.

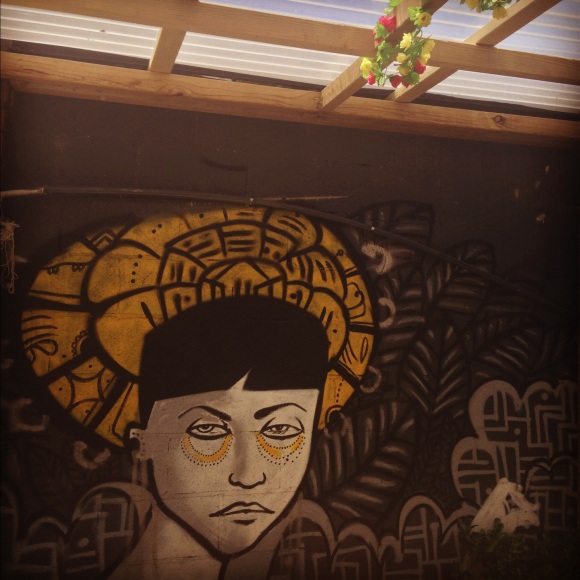
Since moving to Melbourne it’s been a little hectic familiarising myself with city life and wrestling with public transport. However, the good news is I am finally living in the cafe capital of the world. I’d must admit, blogging about Melbourne cafes does frighten me a little, with so many to choose from and endless blogs to read about them. This is my personal take on the cafes I fall in love with along the way of becoming a true Melburnian.

Finding a disability friendly cafe has deemed to be difficult. It seems most ‘hip’ cafes are designed without this in mind. This has inspired me to blog about disabled friendly cafes more frequently, to help spread the word to people who enjoy the cafe culture just as much as mum but happens to be in a wheelchair.

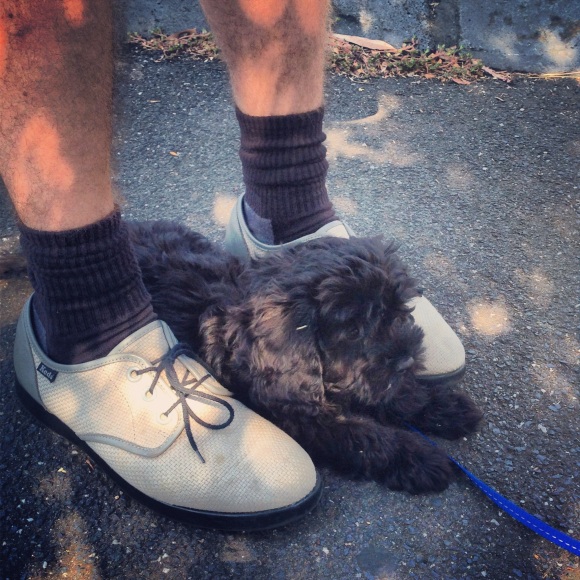
Mitte has become my family’s regular spot. It is just down the road from my sisters place, sitting unassumingly on a residential street. The space is limited inside, but with tables outside and ample parking, mum can join in on the antics. With a puppy now in the family, Mitte is ideal.  The summer months were spent here basking in the sun, laughing and enjoying good quality coffee.

photo (2)

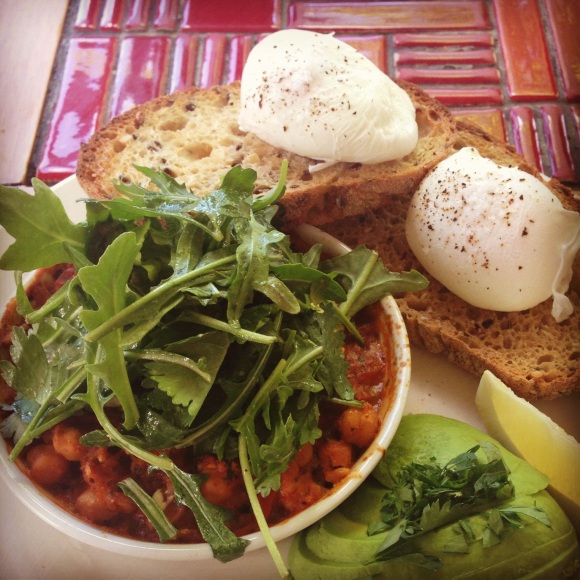
The menu is extensive for how small the space is.  The middle eastern poached eggs would hands down be my favourite dish.  Two perfectly poached eggs on multigrain toast, a side of avocado and the most phenomenal chickpea bake in a rich and spicy tomato sauce, topped with goats feta, red onion, rocket and parsley.  For the sweet tooth, the bircher muesli with nut crumble and rhubarb would come in with a close second. My mums favourite? Homemade pikelets with lemon curd, brown sugar and maple syrup. enough said.

photo (1)

photo

Five reasons why I would go to Mitte

1. Great place to take your pup, as there is a small amount of grass they can play in

2. Great in summer months, where you can sit outside while enjoying a deliciously well made coffee.

3. Mitte sits on a quiet residential street, with ample parking

4. Wheelchair accessible but would only recommend outdoor seating

5. Sweet breakfast? Mitte is your cafe.

Mitte

76 Michael Street
Fitzroy North
03 9481 7097
Mon 7:30 am – 4:30 pm
Wed to Thu 7:30 am – 4:30 pm
Sat to Sun 8:00 am – 4:30 pm

Tagged , , , , , , , ,

red.velvet.cheesecake.brownies

photo (41)

I don’t have a valentine this year so I’d thought I share the love. I definitely believe in treating your valentine with a sweet treat or something hand made around this time of year.  These brownies I made last year for my valentine and I to completely indulge in. Unbelievable. I have no doubt you will win the heart of your valentine with these.

Red Velvet Cheesecake Brownies 

Ingredients:

Brownies
1/2 cup butter
60g dark chocolate, roughly chopped
1 cup sugar
2 large eggs
1 tsp vanilla extract
1 1/2 tsp red food colouring
2/3 cup plain flour
1/4 tsp salt

Cheesecake topping
225g cream cheese, room temperature
1/3 cup sugar
1 large egg
1/2 tsp vanilla extract

Method:

Preheat oven to 180C. Line a 20cm pan (or the best medium sized, rectangular baking tray available) with baking paper so that it extends up and over the edges. Lightly butter the baking paper. Melt butter and chocolate together in a saucepan and then stir until mixture is smooth and combined. Set aside to cool.

For the brownie mixture; combine sugar, eggs, vanilla extract and red food colouring in a large bowl. Add chocolate mixture and stir until smooth. Add flour and salt. Stir until just combined and no streaks of dry ingredients remain. Pour into the lined pan and spread into an even layer.

To prepare cheesecake mixture; beat cream cheese, sugar, egg and vanilla extract in a medium bowl until smooth. Distribute the cheesecake mixture in roughly eight even dollops over the brownie mixture. With a knife, lightly swirl the mixture from one end of the pan to the other to create a nice pattern.

Bake for 35-40 minutes, or until a knife inserted into the mixture comes out clean(or relatively clean depending on how gooey you like to serve your brownies). Edges should be lightly browned. Leave it to cool completely before you pull it out of the pan, use a heart shaped cookie cutter to make brownie slices.

Adapted from Madison Mag 

Tagged , , , , , , , ,

The.Top.Shop

photo (40)

How time flys. It has now been 6 months since I left the Gold Coast.  I have love-hate relationship for the place but recently I have been longing for the picturesque beaches. One of my favourite parts of living on the Gold Coast was getting in the car and driving in any direction as there would always be a new discovery.  My favourite destination was Byron Bay, which is only 1 hour drive south of the Gold Coast.

Bypass the tourist traps and head straight to The Top Shop; a coffee haven tucked away on a hill.  Here you can sit on the grass getting your dose vitamin D, as well as your coffee fix.  They serve big burgers, deliciously dangerous cakes and super thick smoothies. The perfect destination after a refreshing swim or surf in the ocean.

After going here each time I visited Byron Bay and raving about it to family and friends, (and in true Tasmanian style) I came aware that my mother was good friends with the owner’s mother . So when mum came to visit we made the special visit to The Top Shop. She too was very impressed.  As it is on a steep hill, it may be a little difficult for people with mobility difficulty. With the help of other family members, however, mum entered with ease. Communal tables with stools are the main seating options, so a takeaway might be the best.

Five reasons why I would go to The Top Shop

1. After a big swim/surf what better way to spend the afternoon basking in the sun, chatting to friends and sipping on a deliciously smooth coffee

2. Haloumi burger for lunch.  Enough said.

3. They have a little window, so if you just want to swing by for a takeaway before taking in the views at the lighthouse.

4. Out of the hussle and bussle of the main strip of Bryon. Indulge in something sweet when no one is looking.

5. Takeway lunch, head down to the beach to watch the ocean put on a show.

The Top Shop, Byron Bay

Tagged , , , , , , ,

roller.door.cafe

photo

photo (1)

photo (2)

Recently I spent the day in Melbourne after a busy weekend in Sydney.  I had been up since 3:30am to catch my flight, so by 1pm I was desperate for a decent coffee and food to satisfy.   Melbourne is renowned for it’s food and trendy cafes, however it doesn’t matter what time of the day it is, you will be in a que waiting to be seated.  I definitely didn’t have to patience to do that today. My little brother lives in Melbourne, who also has a passion for good coffee and suggested a place in West Melbourne; Roller Door Cafe.

Roller Door Cafe is tucked away nicely just outside the city, right next to the North Melbourne train station. Strange spot for a cafe, but it’s Melbourne – if it’s a good cafe people will travel to it. As the name suggests, it’s literally in a tiny shed, but this doesn’t detract from the quality of food and coffee they have to offer. Upon entering you really feel like you are in someones backyard. This is something I always search for in a cafe.

We sat on a large table with the sun streaming in, kicked off my shoes and ordered a mixed berry smoothie.  Exactly what I needed on a hot summers day.  Deliciously refreshing. The menu size is decent for how tiny their kitchen is and with the lack of sleep, deciding what to have was made difficult.  I finally chose the eggs ‘romantic’ – free ranged poached eggs on sourdough with slow roasted roma tomato, crispy proscuitto, basil pesto, shaved grana padano, pear and roquette. The flavours were perfect together and just the right amount for my stomach to be content.  I needed an extra kick for the day, so I ordered a latte. I was pleasantly surprised to receive one full of flavour but super smooth.

Roller Door is not very disabled friendly as it is tiny, and toilets could be a issue, but you could squeeze in the front room for a quick bite.

Five Reasons why I would go to Roller Door Cafe

1. Away from the hussle and bussle of central Melbourne, but still walking distance.

2. No waiting lines!

3. Coffee, definitely high up there on my melbourne coffee list

4. I could have sat there for hours dozing in the sun and reading a book from their small library.

5. Great for takeaways on your way to the city.

Photos: Jonathan Butler

Roller Door Cafe

Tagged , , , , , ,

Santa.Hat.Brownies

photo

photo (1)

So it’s only 3 weeks till Christmas and if you are like me, the most important meal on the day is desert.  Last year my family (well…maybe just me, but they weren’t complaining!) went all out with Christmas sweets. I think we were still eating them two weeks after Christmas! The most popular sweets between the family were the Santa hat brownies.  My sister put me on to recipe, so we decided to take the challenge together.  Now I would be lying to say these aren’t fiddly to assemble, but they are extremely easy to bake. With a little bit of OCD, I was a little frustrated making these and I think my sister vouches to never bake with me again! However, if you are patient they really do turn out fantastic and simply delicious!

Santa Hat Brownies
12-16 brownies
Ingredients:

  • 1 pan (8×8) of any brownie mix (you can use a packet mix to make it easier!) cooled and cut into a small round cylinder
  • 12-16 small strawberries, cleaned and hulled
  • Chocolate ganache (recipe below)
  • vanilla mascarpone buttercream (recipe below)

Chocolate Ganache
Ingredients:

  • 250g dark chocolate
  • 1/3 cup cream

Mascarpone Buttercream
Ingredients:

  • 1/2 cup unsalted butter, room temperature
  • 225g mascarpone cheese, room temperature
  • 2-1/2 to 3 cups pure icing sugar
  • 2 teaspoons vanilla extract
  • pinch of salt

Method:

Bake brownie to packet instructions.

Combine chocolate and cream in a heatproof bowl over a saucepan of simmering water. Stir with a metal spoon until smooth. Remove bowl from heat. Set aside at room temperature to cool, stirring occasionally, until ganache is thick and spreadable.

Using an electric mixer, beat butter and mascarpone cheese until light and creamy, about 2 minutes.  Add vanilla extract and salt.  Add 2-1/2 cups of sugar, half a cup at a time and continue beating until smooth.  Buttercream should be nice a thick for easy assembling  If needed, add more sugar to get the right consistency. It is really important to get the right consistency as the piping on the brownies is the tricky part!

To assemble, spread the chocolate ganache on top of the brownie. Then pipe a ring of vanilla buttercream on top of each brownie.  Cut off the base of a strawberry so it is flat and place it upside down on each brownie, pushing down slightly to secure in place.  Top the tip of the strawberry with a dot of buttercream to complete the hat.

Adapted from Daisy’s World 

Tagged , , , , ,